Lab 4 - Introduction to Git, GitHub & HTML5
Overview
This week's lab will cover the following:
- Configuring your development environment.
- Identifying the basic elements of a simple web page.
- Describing HTML syntax, tags, attributes and values.
- Creating a web page.
- Previewing a web page in a browser.
- Using GIT for version control.
- Adding your code to a GitHub repostiory (repo).
- Posting a web page to your web server.
Lecture Slides
Creating a GitHub account
Navigate to github.com and create an account (if you don't already have one) using your college email address. You may also wish to add your personal email address as a secondary one. You can change this to your primary email address at any time; which might be useful post graduation.
In the next steps you will be accessing GitHub classroom. You will also be using git with Visual Studio Code to push your code (web pages) to github.com, where you will then pull them into your Apache web server. These tools are all free, open source, and commonly used in web development.
Introduction to Git & GitHub
Use the following link to set up your access to the Introduction to Git & Github materials (provided by GitHub Classroom). Read through and everything before you continue. The purpose of this exercise is to familiarize yourself with Git & Github. To submit this, edit the instructions (README.md) by clicking on the pencil in the top right corner. You may wish to complete any of the additional items under Optional next steps. You are required to add your name and a short bio to access the Student Developer Pack which comes with free access to a ton of useful industry tools and services. You will need access to this for assignment 1, so you can register a domain name (for free!).
You may want to install the GitHub mobile app. It allows you access to your GitHub profile and repos from the comfort of your smart phone. It also allows you to secure your GitHub.com account with two-factor authentication if you wish to. You can install it for Android or iOS.
Configuring SSH keys in AWS & GitHub
You're going to want to configure secure remote access between your GitHub repository and your Ubuntu Server instance in AWS. Fortunately, you have the perfect tool available at your fingertips. You've already used this somewhat.SSH key pairs.
Start your www instance in the AWS Learner Lab, and connect to it using SSH. Once you have logged in, issue the following command to generate a 4096 bit RSA keypair for your GitHub account's email address (replace username@email.com with your email address).
ssh-keygen -t rsa -b 4096 -C username@email.com
Accept the defaults and provide a secure passphrase (twice). Your keypair will be generated, with the public key saved as id_rsa.pub in .ssh (a hidden directory) in your home directory.
Before copying this into your GitHub account settings, you'll want to test it. Issue the following command to test it:
ssh -T git@github.com
This should fail, because you have't added your ssh key to GitHub.
You should see the following output:

Issue the following command view your public key.
cat .ssh/id_rsa.pub
- With your mouse, select the contents of the cat command (beginning with ssh-rsa and ending with username@email.com) and copy it.
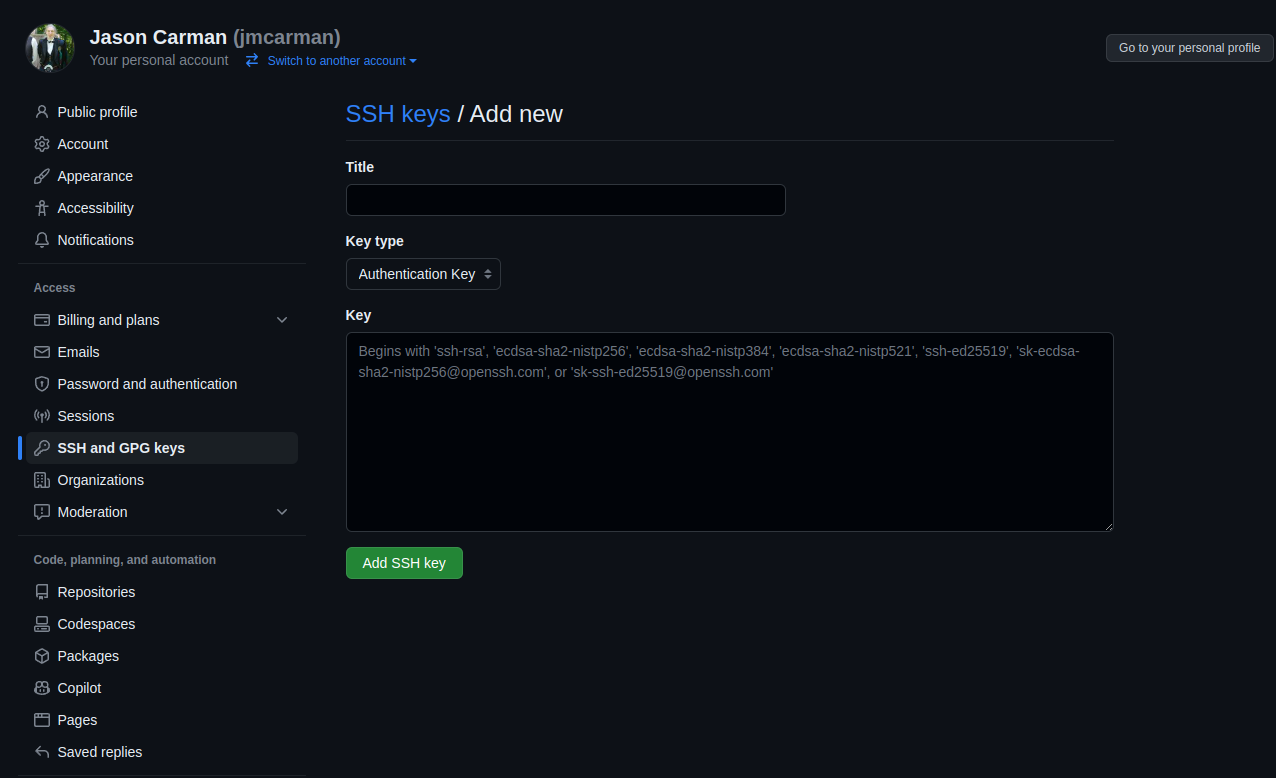
- Access the SSH and GPG keys settings in github.com (you will be prompted to login if you haven't already.
- Click New SSH key, give it an appropriate title and paste in your public key (see following screenshot).
Try issuing the following command again. It should work now.
ssh -T git@github.com
Creating your Github Repo for your Labs
Use the following link to set up your labs 4-5 repository. You will be using this for labs 4 & 5
Next, you will set up your development tools (Visual Studio Code or VS Code and Git). Follow the sections for setup on a Shared Computer by Accessing GitHub Codespaces or on your Personal Computer.
Shared Computer (ie College PC): Accessing GitHub Codespaces.
Once you have set up your Lab 4-5 repository by following the link above (go back and do that if you missed it), you can access GitHub Codespaces from any browser on any device (PC, tablet, smart phone). Codespaces gives you access to Visual Studio Code, with direct access to your repository (without having to clone) from anywhere. It's perfect for a portable development environment. Login to GitHub (if you haven't already) and proceed.
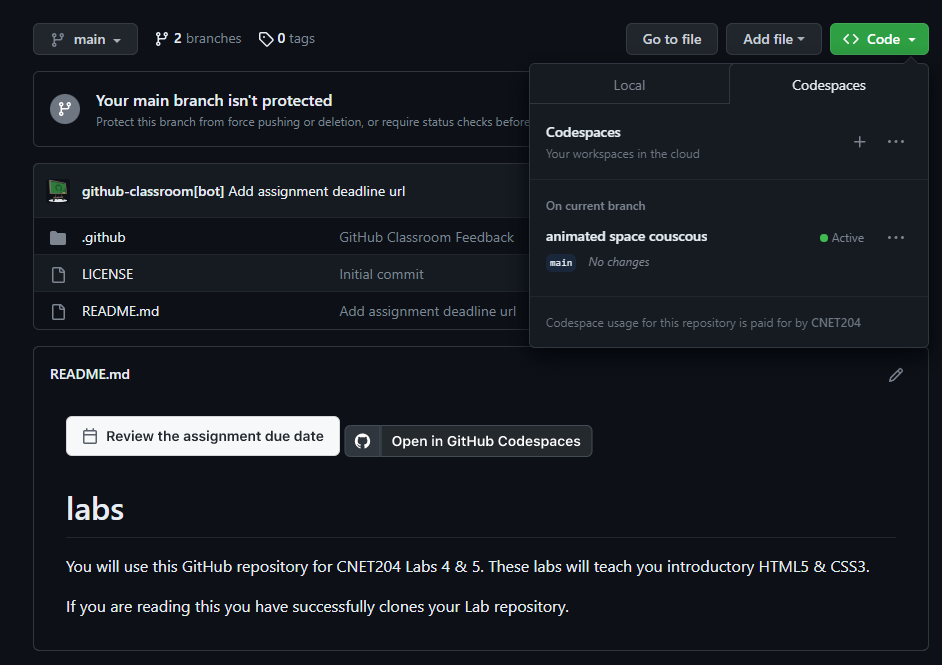
You may have noticed in the link above you can click Open in GitHub Codespaces. Feel free to do so now. If you have already clicked past that window the next few steps will show you how to access it again (which is useful for future access attempts anyway). Click on <> Code and create a new codespace. Once you have created it, you can access it by clicking on the named link.
It may take a couple seconds to create your Codespace, but once it launches it is exactly like the interface in Visual Studio Code. That is because it is Visual Studio Code, running in an Ubuntu container in the cloud through GitHub. You get access to this completely free through GitHub Classroom. If you are working from a Shared Computer (ie a College PC), you can skip the Personal Computer set up below for now and proceed to Creating Your First Webpage. You will want to set up your Personal Computer with Visual Studio Code and Git later.
Personal Computer: Downloading Visual Studio Code (VS Code)
The College PCs should all have Visual Studio Code and Git installed on them. You can login to your GitHub account using a college PC to do your lab as well (instead of using Codespaces). Watch the lab demonstration video on eCentennial to see how.
You will be using Visual Studio Code and Git to develop your website. If you are working from home or your laptop however, you will want to install and configure both of these. If you are working on a PC at Centennial College, skip to the next section (configuring Visual Studio Code). You can download and install Visual Studio Code in the following ways:
- From the Visual Studio Code website.
- In Windows - From the Microsoft Store: search for vscode and click Install.
The Visual Studio Code website has installers for Windows, Linux (Debian and Red Hat based) and macOS.
Configuring Visual Studio Code & Git
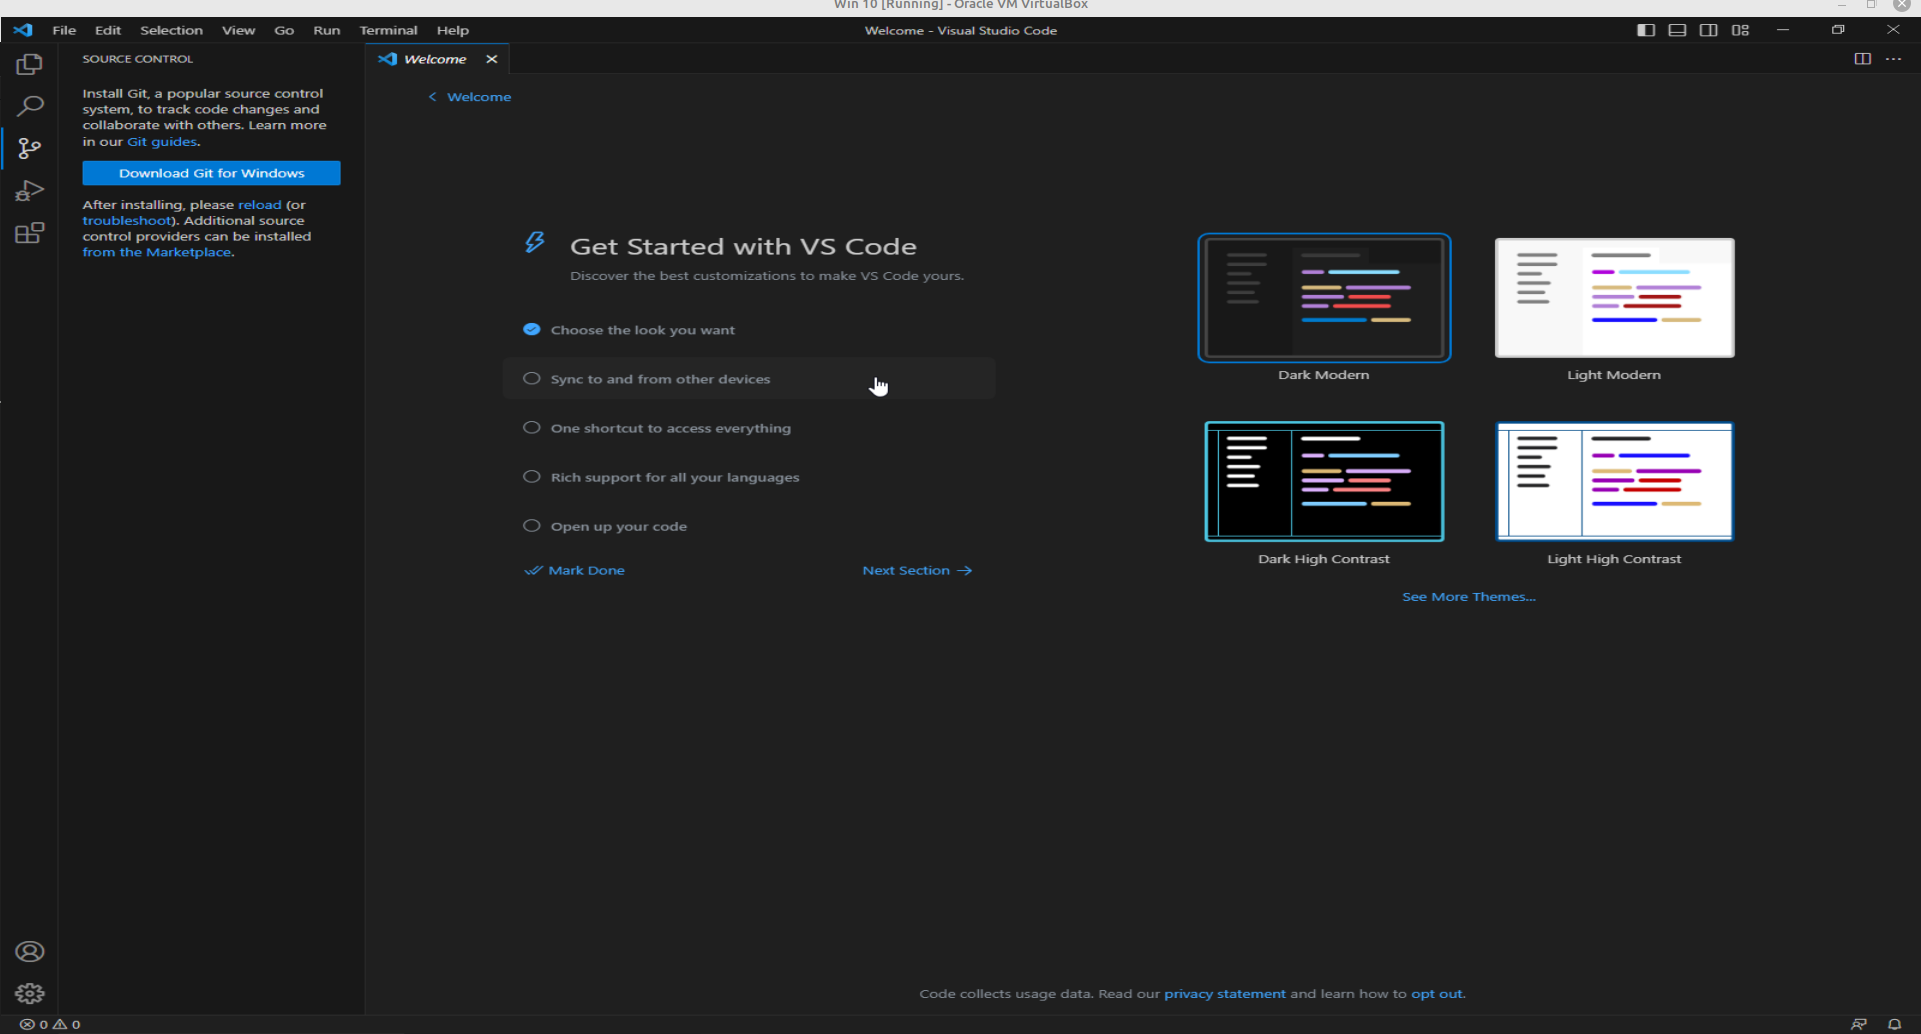
Visual Studio Code (VS Code) is a powerful editor designed for programming and scripting. It is open source and available for free. It also works cross-platform, meaning you can install it in Windows, macOS or Linux. Additionally, it has source control tools for git and GitHub built-in. Launch Visual Studio Code, click on Source Control on the left and click the Download Git link unique to your operating system (see the following screenshot).
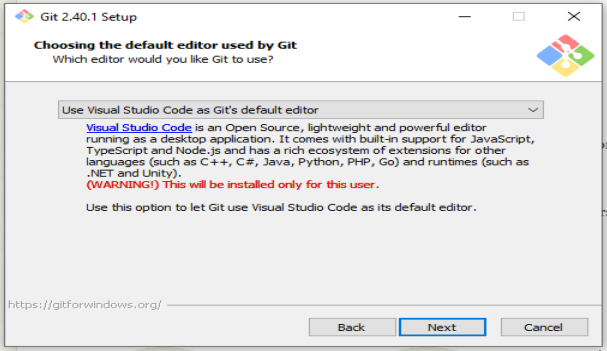
When you're installing Git, accept the defaults except for Choosing the default text editor used by Git. Select Use Visual Studio Code as Git's default editor from the dropdown (screenshot below).
Once the installation is finished you will have to close and re-open VS Code to access Git.
Cloning Your Repository in VS Code
- In order to clone your repository in VS Code, you need to first sign in with GitHub. Open VS Code and click the profile icon in the bottom left. It is located directly above the settings (gear) icon. Sign in with GitHub.
- Next, click on Source Control and click Clone Repository. Select Clone from GitHub in the url bar, and select the CNET204/labs-assignment-1-youruser repository.
- You will now select the local folder to be used as your Repository Destination. If you are working on a PC at the college, set this to your H drive. If you are working from your own PC, set this to a folder of your choosing (but remember where it is). The advantage to using your H drive on a college PC, is it is automatically mounted on any PC you log into. Additionally, you can access your H drive through myCentennial.
You may be prompted to sign in. Accept any other prompts, including opening the repository locally and select:Yes, I trust the authors.
Creating your first web page
Before creating your first web page, it's best to lay out the required structural tags (an example follows). You can then fill in the rest of the data using this simple template. Remember, a web page is everything that exists between the opening and closing html tags (<html> and </html> respectively). It consists of three main parts:
- The Doctype Declaration
- The document type declaration tells the browser what type of document to expect. There are many different doctypes, however for this course we will be using the one for HTML5.
- The Head
- Consists of everything between the head tags (<head> and </head> respectively). This section contains information about the document, and won't appear on the page itself.
- The Body
- Consists of everything between the body tags (<body> and </body>). This section contains the document itself. Everything in here will appear as your web page.
Click on new file (in the welcome screen) and create a new file named index.html. Save it in your local repository folder and fill in the structure using the below sample. This is the file you'll be editing for the rest of the lab.
		<html>
			<head>
			</head>
			<body>
			</body>
		</html>
Add the doctype
Add the following to your webpage above the opening HTML tag (the doctype declaration must be the first thing in your document).
<!DOCTYPE html>
W3Schools has some useful information on the different doctypes and their uses.
Filling in the head
Add a title
Add the title of "First Page" (without the quotes) to the header section of your document.
<title>First Page</title>
Add some meta tags
Meta tags provide additional information about our page. These include what character encoding you're using, and data used by search engines to index your page. Part of Seach Engine Optimization (SOE) is using these appropriately to gain higher rankings with search engines' (such as Google) algorithms. Another large part is properly structuring and formatting your code, which you will learn as you create html documents.
Using the meta tag, define the character set as "UTF-8" (Unicode). This tag defines metadata about the document, and can contain many attributes. We will use several of them over the duration of this course.
<meta charset="utf-8">
Use the meta tag to add author information to your web page (with the content of your name). An example follows.
<meta name="author" content="Linus Torvalds">
The header can contain many other things such as embedded or external links to CSS or JavaScript, which we will visit later.
Filling in the body
Add a heading
Headings are used in of importance, with 1 being most important and 2-6 used for sub-headings in order of descending importance.
Insert the follwing using an H1 tag:
<h1>Your Name's Home Page</h1>
Add a paragraph
Using the paragraph tag (<p> to open and </p> to close), add a paragraph below your heading about what you hope to learn from this course.
Comments
The comment tag can be extremely useful when you're first learning HTML, or when you have a large block of code and want to clearly define where it begins and ends. Comments can make your code easier to read and understand, either by someone else or yourself after quite a bit of time has passed. Comments are not used as frequently in HTML as they are in other languages. To add a comment you require an opening (<!--) and closing (-->) tag. A sample follows below, please feel free to include comments in your labs whenever you encounter something that may be useful to remembering what you've learned later.
<!-- This is a comment, it's contents will only appear when you view the page source through the browser. Comments in HTML can span multiple lines. This is not always true of comments in a other languages, and some can even have a variety of methods for designating a comment -->
To do:
Using what you learned about comments above, add a comment indicating your name and student number as the first line of the body. You are required to do this for every web page you create for this course.
Setting your git username and email
Skip this step if you are using GitHub Codespaces, and proceed to Making your first commit.Before you can push your commit to GitHub, you need to set your username and email (to be included in the commit) from the command line within VS Code. To do this:
- Click on Terminal (in the menu bar across the top of VS Code).
- Click New Terminal.
Then issue the following two commands:
	git config user.name "Your Name"
	git config user.email "youremail@my.centennialcollege.ca"
If you are using your personal computer, you may include the --global option to set these semi-permanently.
Making your first commit
Congratulations! Your have created your first web page. You can now commit it to your github repository. To do this:
- Click on source control (on the left side of the screen).
- Click the three dots at the top of the pane.
- Click Changes and select Stage All Changes.
- Then click Commit.
- Enter a commit message (a short message describing what you have changed) and click on the check mark in the upper right corner.
- Click save when prompted.
- Click Sync Changes at the top of your Source Control pane, and agree to any prompts.
You've made your first commit! You will be doing this many times over the course of the semester. It will get easier with repetition.
Installing your AWS pem key via GitHub Secret
You are going to add your AWS ssh key (.pem) to your GitHub repository as a secret. This will allow you to SSH to your AWS instance from the terminal in Codespaces without specifying the location of the key. To do this:
Add your .pem file as a GitHub secret called "SSH_KEY" using the following steps in **YOUR** new repository:
- Go to Settings (top right corner)
- Click on Secrets and variables
- Click on Codespaces
- Click the Green button labelled New repository secret
View your key (.pem) from the command line using the cat command. To do this:
- In Windows: launch a PowerShell terminal by clicking on Start and typing powershell.
- In macOS: launch a terminal by clicking on Finder, then Applications, then Utilities, and finally Terminal.
- In Linux: launch a terminal by clicking on the terminal icon in your taskbar or by pressing Ctrl+Alt+T.
Once you have your terminal open, change to the directory your key is located. This may be your Downloads folder, or on the College PC your H drive:
cd Downloads
OR
H:
View the contents of your key using the cat command:
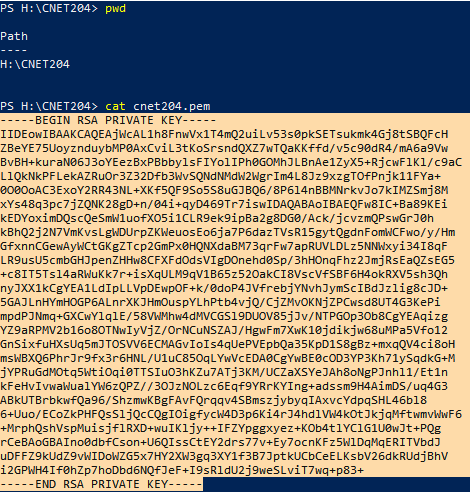
cat cnet204.pem
Using the mouse, highlight the output of the key carefully including the lines -----BEGIN RSA PRIVATE KEY----- and -----END RSA PRIVATE KEY-----. Your output should look similar to the following:
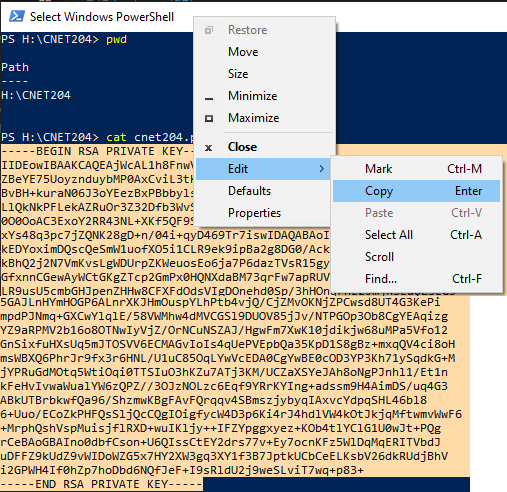
Copy the key to your clipboard by right-clicking on the highlighted text, right-clicking the PowerShell window title bar and selecting Edit and selecting Copy from the context menu. The following screenshot is for reference.
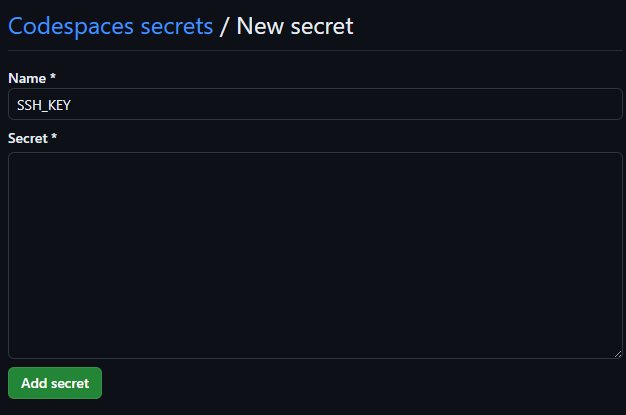
Login to Github, and go to your GitHub repository for Labs 4-5. You are going to add a GitHub secret and paste the key into the secret field. With the following information:
- With the name SSH_KEY
- In the Secret field, paste in the contents of your .pem file (cat from your local command line and copy/paste)
Your screen should look as follows (note, in the screenshot the secret field has been left empty):
Click the green button labelled **Add secret**.
To apply the secret to your Codespaces container, you will need to rebuild it. To do this:
- In the bottom left corner, left-click where it says Codespaces.
- Click Rebuild container from the menu that appears in the top center.
Once the container has been rebuilt, you can SSH to your AWS instance from the Terminal in Codespaces without specifying the location of the key. ie: ssh ubuntu@*ip or FQDN*. You now have the command line access to your web server from within Codespaces! Note, your instance is likely not on and this will not currently work. Continue to the next steps to access your instance from the command line in Codespaces.
Cloning your repository in your Apache server
Start your www instance in the AWS Learner Lab, and connect to it using SSH from Codespaces by issuing the following command:
ssh ubuntu@*ip or FQDN*
You do not need to connect using the EC2 instance connect. However, you now have two methods for accessing your instance. Once you have logged in, issue the following command to clone your github repository into your home directory.
Important: Be sure to replace username in the following command with YOUR GitHub username.git clone git@github.com:CNET204/labs-4-5-username
Issue a command to confirm the repository has been cloned on your Ubuntu server.
Notice the content from our GitHub repository is all there, but it's not in the right place. It is in your user's home directory. It needs to be in document root (/var/www/html), and only root can put it there.
Issue the following command to recursively copy the contents of your labs-4-5-username directory into /var/www/html
sudo cp -R labs-4-5-username/* /var/www/html
Confirm the contents have been written to document root. You should see the following files:
- LICENSE
- README.md
- index.html
Accessing your index page through a web browser
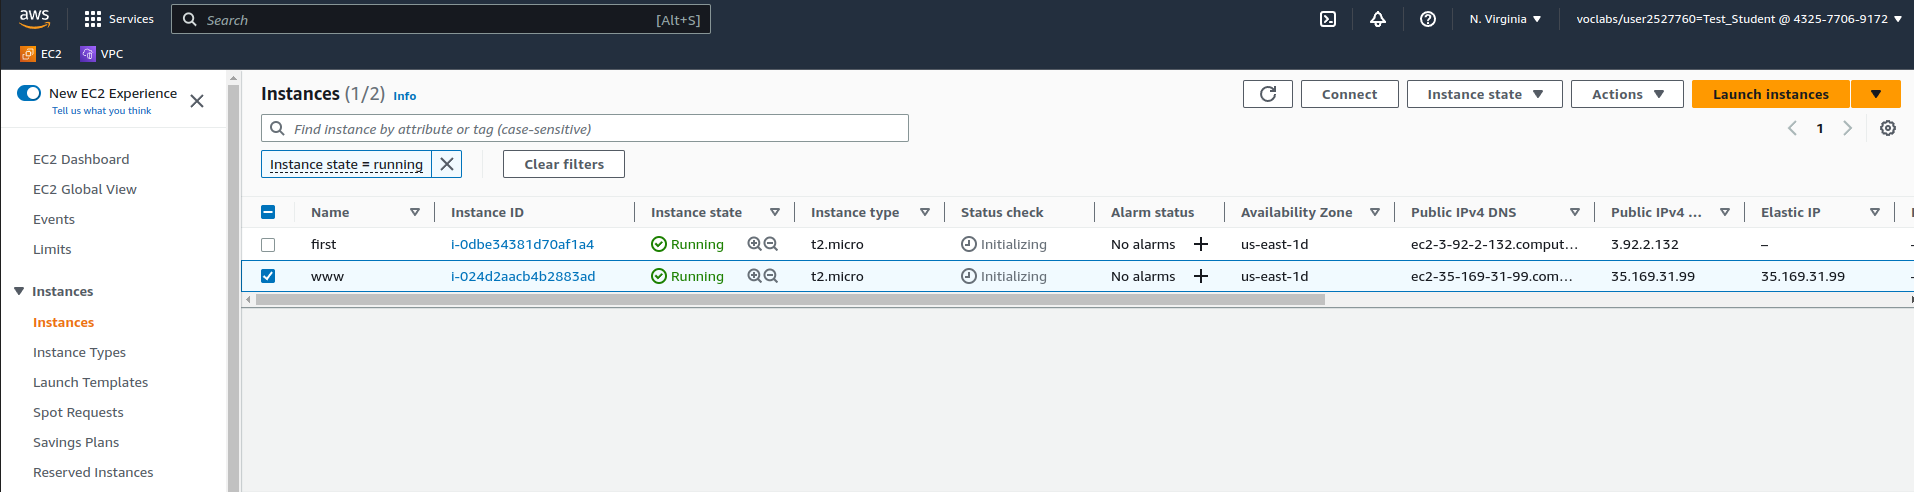
In your AWS Learner Lab, navigate to Instances, highlight the Elastic IP for www (see the following screenshot). Paste this into your web browser. You should see your index.html page!
Completing the Lab
Your page should look similar to the following output. If it does not, go back and complete whatever you've missed.

Upon completion of this lab you should have set up your development environment (VS Code & GitHub) and written a simple web page using some introductory HTML. Your page should validate using the w3schools html validator. To submit your lab you need to submit the code to your GitHub repo (which you did in already in the lab). Additionally, you need to submit a screenshot of it running your server to the assignment folder in eCentennial.
Exploration Questions
The following questions are for furthering your knowledge only, and may appear on quizzes or tests at any time later in this course.
- What does HTML stand for?
- What are the two main parts of a web page?
- What sort of things appear in the header? Which two did we use in this assignment?
- What sort of things appear in the body? Which two did we use in this assignment?
- What is the range of heading tags? Which is the biggest? The smallest?
- How do you access your index.html in the browser?
- In git, what does cloning your repository do?